
Wall Mounted Garment Rack
Popular Subcategories
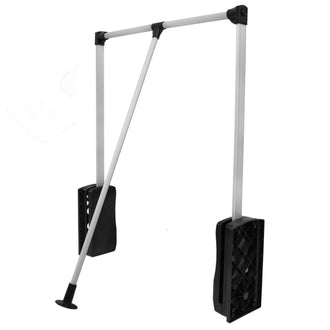
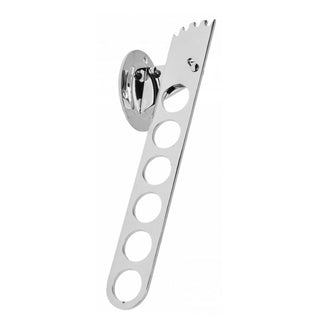
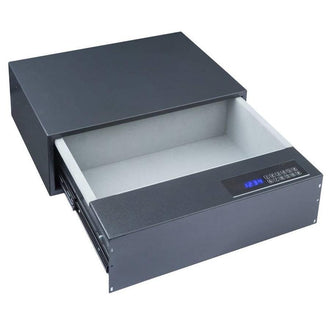
-
Wall-Mounted Rack - ChromeRegular price $10.30Unit price / perRegular priceSale price $10.30
-
Wall mounted clothes rail L=15-3/4 inch, 5 HooksRegular price $9.91Unit price / perRegular priceSale price $9.91

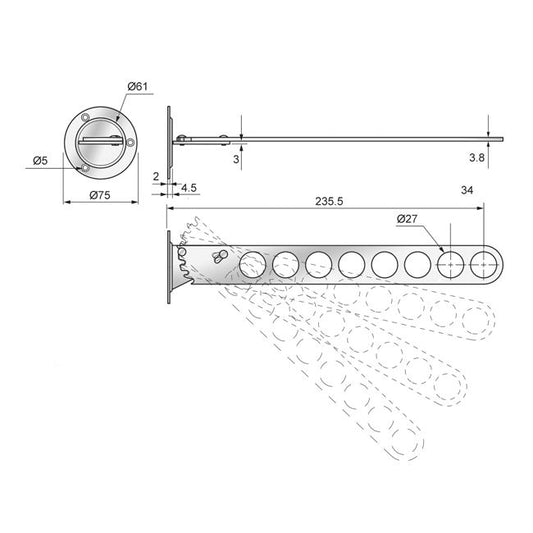

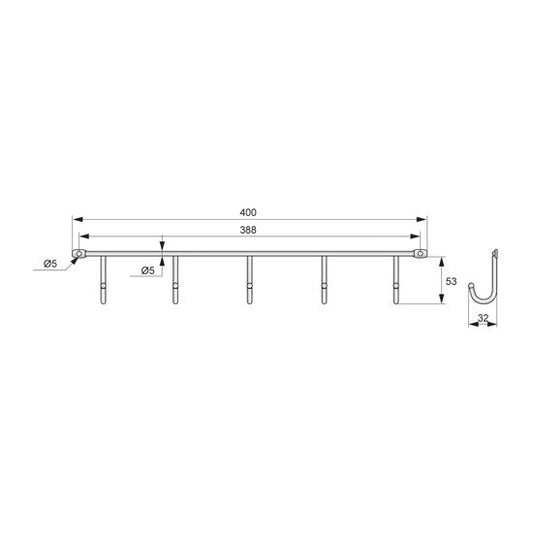
Awall mounted garment rackis a load-bearing mounting element fixed horizontally to vertical structural components—typically masonry, drywall, or solid furniture backs—to serve as a holder for clothes hangers or hooks. Unlike freestanding coat racks, a wall mounted garment rack directs the static and dynamic loads of suspended clothing straight into the wall structure. This requires precise coordination of leverage, mounting hardware, and wall material properties.
Planning awall mounted garment rackinstallation presents specific structural mechanics challenges. Properly installed, a garment rail behaves structurally like acantilever bridge beam, where the entire leverage effect and weight of the hanging load act directly on the mounting points at the base. In this technical guide, installers, cabinetmakers, and experienced DIYers will learn everything about proper dimensioning, material selection, and secure anchoring for clothing hanging rails.
Design Types and Technical Versions
Selecting the right rail for wall installations depends heavily on room geometry and anticipated load capacity. Mounting technology generally distinguishes between cantilevered systems, alcove solutions, and system-integrated hook rails.
Cantilevered Wall Garment Racks (Front-Mount)
In this classic configuration, the rail projects into the room at a 90° angle from the wall. This design is frequently used in narrow hallways because garments hang behind one another, consuming less wall width. Because the leverage force increases exponentially with every inch away from the wall, these designs are usually limited to lengths between 9-7/8 in and 15-3/4 in (250 mm and 400 mm). A typical example of this design is theWall Garment Rail L=400mm, 5 Hooks. Integrated hooks provide defined hanging points, preventing clothes from sliding and distributing the load evenly across the 15-3/4 in (400 mm) length.
Wall-to-Wall Garment Rails (Niche Mount)
When installing a garment rail wall-to-wall, professionals refer to it as an alcove or niche mount. Here, a tube—typically 1 in or 1-3/16 in (25 mm or 30 mm) in diameter—is spanned between two parallel walls. Mounting is performed via flange sockets or tube supports screwed into the opposing walls. The structural advantage: there is no leverage effect (cantilever effect), only pure shear force acting on the screws. On solid walls, this construction easily supports loads from 88 lbs to 132 lbs (40 kg to 60 kg), making it ideal for walk-in closets. However, for spans of 39-3/8 in to 47-1/4 in (1000 mm to 1200 mm) and above, a center support (ceiling drop or wall bracket) is mandatory to prevent tubing sag.
Wall Coat Rail with Hooks (Parallel Mount)
In this variant, thewall mounted garment rackruns parallel to the wall, held at a distance by two or more wall brackets. The wall clearance must be dimensioned so standard clothes hangers (width approx. 16-1/2 in to 17-3/4 in (420 mm to 450 mm)) hang freely without rubbing against the wall. This means the centerline of the rail must be at least 11 in, preferably 11-7/8 in (280 mm to 300 mm) away from the wall surface. Alternatively, fixed hooks are often attached to such parallel tubes. To maintain flexibility, you can install a simple round tube and combine it with aWall Clothes Hook, Chromematched to the system as needed.
Materials, Finishes, and Tube Wall Thicknesses
The mechanical load capacity of awall mounted garment rackis determined by the profile material and geometry.
- Steel Tube (Chrome-Plated or Powder-Coated):Steel provides the highest flexural rigidity. A steel tube with a 1 in (25 mm) diameter and a 1/16 in (1.5 mm) wall thickness barely flexes even under heavy winter coats. A black garment rail is generally made from powder-coated steel. The powder coating offers high scratch resistance against constant friction from metal or wooden hangers.
- Aluminum:Aluminum is significantly lighter but requires a thicker wall (typically 5/64 in to 3/32 in (2.0 mm to 2.5 mm)) for the same load capacity. It is corrosion-resistant and thus suitable for damp locations (e.g., when hanging wet clothes to dry).
- Stainless Steel:The most solid and durable option. Stainless steel tubes (V2A / Grade 304) do not rust, and brushed finishes conceal hanger scratches particularly well.
Material selection also affects tactile feel and noise level. Moving metal hangers on a chrome-plated steel tube creates louder scraping sounds than on a powder-coated tube.
Structural Dynamics and Load Transfer: The Wall as the Limiting Factor
Even the sturdiestwall mounted garment rackis only as strong as its anchor in the substrate. The load divides into two physical forces:
- Shear Force:The pure weight of the clothing pulling vertically downward, attempting to shear the screw like a guillotine.
- Tensile Force (Pull-out Force):The projection distance of the rail from the wall creates torque. The upper screw of the wall bracket experiences massive tensile pull—risking tearing out of the wall along with the anchor.
Installation in Concrete and Solid Brick (Masonry)
This represents the ideal structural scenario. To mount aWall Garment Rail L=400mm, 5 Hooksin concrete, standard nylon expansion anchors with a 5/16 in (8 mm) diameter combined with wood or chipboard screws sized #10 x 2-3/8 in (5 x 60 mm) are sufficient. The drill bit size matches the anchor diameter (5/16 in (8 mm)). The drill hole must be at least 3/8 in (10 mm) deeper than the anchor length to allow complete expansion.
Installation in Aerated Concrete and Hollow Block
Standard anchors reach their limits here. In hollow masonry, standard wall plugs often expand into empty voids. Special cavity anchors or long-shaft anchors must be used. Hammer drill mode must never be used when drilling, as it destroys the thin internal webs of hollow brick.
Installation on Drywall (Hollow Wall Construction)
When installing awall mounted garment rackon drywall, extreme caution is required. Single-layer 1/2 in (12.5 mm) drywall will quickly tear out under concentrated tensile loads.
- Solution A:Anchor directly into vertical wood or metal studs behind the drywall (typically on 16 in or 24 in (406 mm or 610 mm) centers).
- Solution B:Use specialized metal cavity anchors (toggle bolts or hollow wall anchors) that expand umbrella-style behind the panel. Load capacity remains limited to approximately 33 lbs to 44 lbs (15 kg to 20 kg) per fixing point. Pure drywall without wood backing (OSB/plywood blocking) is unsuitable for heavy winter coats on long cantilevered projections.
Installation on Furniture Backs or Wood Panels
When fixing a garment hanging rail to wood panels (particleboard, MDF, solid wood), wall anchors are unnecessary. Wood screws are used directly. If the panel is thinner than 3/4 in (19 mm), use through-bolts (M4 or M5 machine screws) with a washer and locknut on the backside to prevent thread stripping.
Tools and Preparation for Assembly
Installing awall mounted garment racksolution correctly requires the following tools:
- Tape measure and pencil
- Spirit level (min. 16 in (400 mm) length, preferably 24 in (600 mm))
- Hammer drill (for concrete) or cordless drill/driver (for wood/drywall)
- Masonry or wood drill bits (typically 1/4 in or 5/16 in (6 mm or 8 mm))
- Cross-line laser level (optional, but extremely helpful for aligning multiple items like theWall Clothes Hook, Chromealong a precise horizontal line)
- Screwdriver or driver bit set (typically PZ2, PZ3, or TX20/TX25)
Step-by-Step Installation Guide
1. Determine Mounting Height:The standard ergonomic height for awall mounted garment rackranges between 63 in and 67 in (1600 mm and 1700 mm) above the finished floor level. This height ensures long coats (typical length approx. 47-1/4 in to 55-1/8 in (1200 mm to 1400 mm)) do not touch the floor while keeping the rail easily accessible for average-height users. If hanging only shirts or short jackets, a clearance of 39-3/8 in to 43-1/4 in (1000 mm to 1100 mm) above a shelf or shoe cabinet below is sufficient.
2. Mark Drill Holes:Hold the flange or bracket against the wall and align it precisely using a level. Mark hole locations with a sharp pencil. For alcove installations (wall-to-wall garment rails), measure the exact distance between walls at the desired height. Subtract a 1/16 in to 1/8 in (2 mm to 3 mm) clearance tolerance so the tube glides effortlessly into the socket flanges without tension.
3. Drill and Insert Anchors:Drill at a precise 90° angle to the wall. Vacuum out dust from the drill hole afterward; masonry dust left inside prevents anchors from gripping fully. Tap the anchor flush with the wall surface.
4. Fasten Brackets and Secure Rail:Screw brackets tightly into place. On models such as theWall Garment Rail L=400mm, 5 Hooks, a concealed mounting plate is often screwed to the wall first. The actual rail is then fitted onto this plate and locked from below with a small setscrew (typically 5/64 in or 3/32 in (2 mm or 2.5 mm) hex key). This hidden fastening technique provides a clean appearance with no visible screw heads.
Specific Application Areas in Interior Design
Entryways and Hallways
Space is frequently limited here. Awall mounted garment rackprojecting forward into the room is often the ideal choice. With a projection of 11-7/8 in to 15-3/4 in (300 mm to 400 mm), it holds 4 to 6 heavy jackets. Integrated fixed hooks prevent garments from slipping forward off the end.
Bedrooms (Open Closet Systems)
Trends favor open dressing systems without full wardrobe cabinets. Longwall mounted garment racksare widely used here. For spans over 39-3/8 in (1000 mm), a center support is required. To maintain visual balance, align rail lengths precisely with underlying dresser or drawer module widths (e.g., 23-5/8 in or 31-1/2 in (600 mm or 800 mm)).
Utility Rooms and Bathrooms
Although primarily intended for clothing storage, users often seek solutions to air-dry damp textiles. In humid areas, aluminum or stainless steel is essential. Chrome-plated steel exposed to sustained high humidity and micro-scratches from hangers can eventually develop surface rust.
Accessories and System Additions
Awall mounted garment rackconfiguration rarely stands alone. Systems are frequently supplemented with additional hardware:
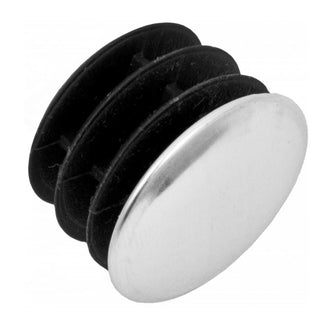
- End Caps:Cutting tubes to custom lengths creates sharp edges. Plastic or metal end caps seal the tube neatly and prevent snagging or injury.
- Additional Hooks:S-hooks or screw-mounted items like theWall Clothes Hook, Chromeexpand versatility. They are ideal for bags, scarves, or hats that do not belong on a clothes hanger.
- Center Brackets:Essential over longer spans as noted. They attach to the tube from above (ceiling drop) or behind (wall mount), supporting weight without blocking hanger travel along the rail.
Frequently Asked Questions (FAQ) – Wall Mounted Garment Racks
At what height should a wall mounted garment rack be installed?Standard mounting height for long garments (coats, dresses) is 63 in to 67 in (1600 mm to 1700 mm) from the floor. For short clothing (shirts, suits, blouses), 39-3/8 in to 43-1/4 in (1000 mm to 1100 mm) above the floor or lower shelving is recommended.
How much wall clearance is needed for clothes hangers?When the rail runs parallel to the wall (wall-to-wall or via wall brackets), the center axis of the tube must be at least 11 in, ideally 11-7/8 in (280 mm to 300 mm) away from the wall. A standard clothes hanger is roughly 16-1/2 in to 17-3/4 in (420 mm to 450 mm) wide, leaving adequate clearance (approx. 2 in (50 mm)) to keep garments from rubbing against drywall or wallpaper.
How much weight can a wall mounted garment rack support?Load capacity depends primarily on wall substrate quality. In solid concrete or brick, a single fixing point using 5/16 in (8 mm) wall plugs safely supports 66 lbs to 88 lbs (30 kg to 40 kg). However, on front-projecting models like theWall Garment Rail L=400mm, 5 Hooks, leverage mechanics apply: the front tip cannot carry the same maximum weight as the area adjacent to the wall plate.
Can I install a garment rack on a drywall wall?Yes, but only with structural precautions. Always use heavy-duty hollow wall anchors or toggle bolts that expand behind the drywall face. Load capacity is limited to roughly 33 lbs to 44 lbs (15 kg to 20 kg) per anchor. Avoid deep cantilever projection designs on unbacked drywall, as high pull-out forces at the top screw can damage the panel face. Niche mounting (wall-to-wall) is safer on hollow walls because loads transfer downward as pure shear force.
What can I do if the garment tube sags?Steel and aluminum tubes flex beyond certain span lengths. As a general rule, 1 in (25 mm) diameter tubes spanning over 39-3/8 in (1000 mm) require center support. Install a wall-mounted intermediate bracket or suspend the rail at mid-span using a ceiling support flange.
Which screws work best for wall mounting?Use pan-head or countersunk wood/chipboard screws (matching the countersink holes in the mounting flange) with Torx (TX) or Pozidriv (PZ) drives. For standard 5/16 in (8 mm) nylon anchors, #10 x 2-3/8 in (5 x 60 mm) screws are ideal. The thread cuts cleanly into the anchor material, achieving maximum expansion force.
How do I cut a garment tube to size accurately?Measure the exact inside width between wall surfaces (e.g., in an alcove mount). Deduct 1/16 in to 1/8 in (2 mm to 3 mm) to account for flange socket depth. Clamp the tube securely in a vise (using soft pads or shop rags to prevent scratching) and cut with a fine-tooth hacksaw. Always deburr the cut edge using a metal file so the tube slides smoothly into fittings during final assembly.
Proper leverage planning, selecting appropriate anchors for the wall substrate, and maintaining ergonomic mounting dimensions ensure that installing hardware like theWall Clothes Hook, Chromeor complete rail systems delivers a durable, rock-solid solution for home storage and commercial fitting projects.